GCam
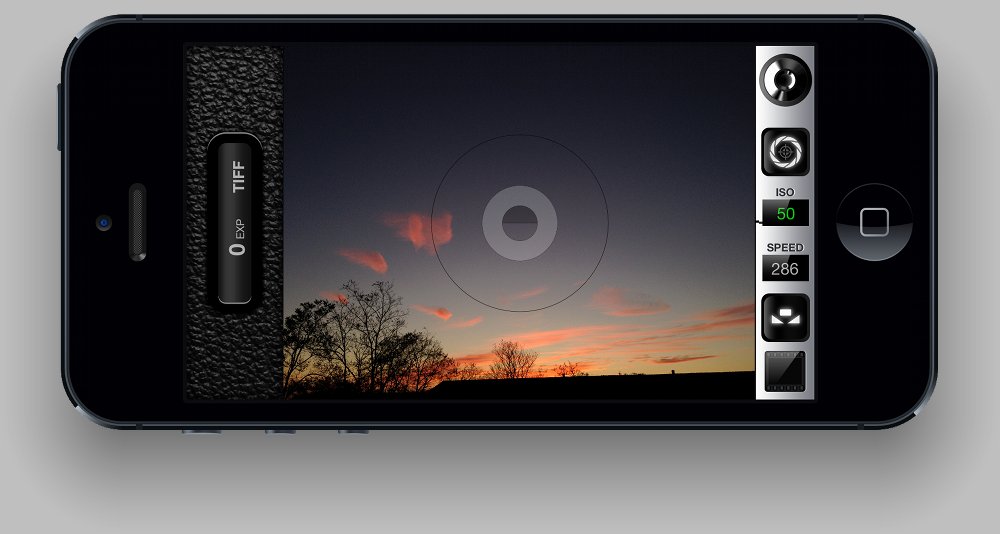

GCam on iPhone 5
With lossless pro-quality dRAW output, full 4:3 aspect ratio preview, useful viewfinder, panel with number of exposures since last app launch plus TIFF/JPEG format indication, control over White Balance, Exposure and Focus and auto-rotating informative interface, GCam is the ideal camera app for the serious photographer.
GCam on iPhone 4S
With lossless pro-quality dRAW output, full 4:3 aspect ratio preview, useful viewfinder, control over White Balance, Exposure and Focus and auto-rotating informative interface, GCam is the ideal camera app for the serious photographer.
- Save developed RAW (dRAW) snapshots as lossless TIFF
- Continuous ISO and shutter speed readouts
- Dual-stage shutter release
- Locked White Balance for complete consistency between shots
- Separate Exposure and Focus locking
- Optional horizontal guide
- Volume '+' shutter button
- Volume '-' torch button
- Full 4:3 aspect ratio preview, also on iPhone 5
- Self-timer shooting mode activated with rotation gesture
- Images saved with EXIF, TIFF and GPS metadata incl. direction
- Photo viewer with info regarding format and Exif metadata (ISO, shutter speed and brightness)
- Images saved in full 3264x2448 pixel resolution on iPhone 4S and iPhone 5 (2592x1936 on iPhone 4)
- Choose between TIFF, JPEG MAX and standard JPEG output
A camera for the serious photographer.
Viewfinder
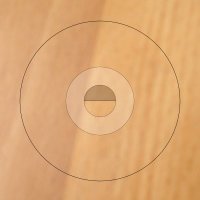
The viewfinder consists of two elements.
1. The outer reference circle is used to set Exposure.
2. The inner focus symbol is shown, when the camera is focusing.

Point and Shoot
A quick way to take a good snapshot:
- Point the camera at a white surface and press the White Balance button. (If there is no white surface, just point the camera in the desired direction and press the White Balance.)
- Press the shutter button to lock Exposure and Focus.
- Arrange the shot.
- Release the shutter button to take a snapshot.

White Balance
- The White Balance is locked by default in GCam, giving you complete consistency between shots.
- To set the White Balance 'correctly', point the camera at a white surface and press the dedicated White Balance button.
- GCam turns on Automatic White Balance as long the White Balance button is pressed, and locks again, when the button is released.
- Or point the camera at a blue or red surface and then press the White Balance button for impressive photos.
- A fast tap will only change the White Balance slightly.
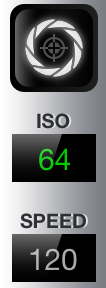
Exposure
- GCam operates in Auto Exposure mode by default.
- When Exposure changes, the ISO and SPEED readouts are updated.
- Exposure can be locked by tapping the dedicated Exposure/Focus button. A second tap will unlock Exposure.
- GCam measures light within the thin black line forming a circle in the viewfinder. This is known as spot metering.
- To get the ISO down for less grainy photos and the shutter speed up for more stable photos, point the camera at a light source or the brightest area of the shot and lock Exposure.
- If Exposure is not locked, pressing the shutter button will lock Exposure until it's released again to take a snapshot.

Focus
- GCam operates in Auto Focus mode by default.
- When the camera is focusing, the round focus symbol is seen at the center of the viewfinder.
- Focus can be locked by pressing the dedicated Exposure/Focus button for about a second. This will cause the focus symbol to flash a few times. A second one-second press will unlock Focus.
- To better see if Focus is set correctly, double-tapping the screen will zoom in. Double-tap again to get back to full view.
- Taking a snapshot when zoomed, will capture the full picture anyway.
- If Focus is not locked, a single tap at the screen will force the camera to do a new Auto Focus operation.
- Also, if Focus is not locked, pressing the shutter button will lock Focus until it's released again to take a snapshot.

Shutter
- The shutter locks Exposure and Focus, if they're not already locked, when pressing the shutter button.
- The snapshot is taken, when you release the shutter button.
This makes it easy to set Exposure and/or Focus to one area of the image, arrange the picture by turning the camera in another direction, and then take the snapshot by releasing the shutter button.
- It's also possible to use the volume '+' on the side of the phone as a shutter button.
- Snapshots taken with GCam ends up in the camera roll photos album.

Photo
- Press the dedicated photo button to view the latest photo in the camera roll photos album.
- Photos in GCam are shown without any filtering. This makes it easier to judge if a photo is in Focus, when zooming in on a photo.
- Double-tap will zoom in to 1:1 ratio between pixels in the photo and pixels on the screen.
- With a pinch gesture, it's possible to zoom in even further to a 1:16 ratio.
- There is a button within the photo viewer, which leads to settings.
TIFF
JPEG MAX
JPEG
Format
It's possible to take snapshots in one of three different formats with GCam, TIFF, JPEG MAX and JPEG.
- TIFF is a lossless format, and it is well suited for further image processing, as it captures pro-quality dRAW output.
- TIFF files take up about ten times more disk space than standard JPEG files.
- JPEG MAX is compressed at Q=100 quality setting and is almost lossless.
- JPEG MAX files take up less disk space than TIFF files, but more than standard JPEG files.
- The JPEG format is compressed at Q=85 quality setting, as is customary on the iPhone.
Horizontal Guide
- Setting the horizontal guide to on will show and activate a little indicator in the interface panel. This helps in balancing the camera.

Self-Timer
- Self-timer shooting mode can be activated by a rotation gesture.
- Touch the screen with two fingers and move the fingers in a clockwise circular motion to increase the time.
- Move the fingers anti-clockwise to decrease the time.
- When self-timer mode is activated, the timer symbol is shown next to the shutter button.
Torch
Pressing the volume '-' button toggle the torch light in the iPhone. The torch light is useful to get the ISO down for less grainy snapshots.
- Turn on the torch.
- Point the camera at your hand or some other close surface until ISO is at the desired value.
- Lock Exposure with the dedicated Exposure/Focus button.
- Turn the torch off again.
This is especially useful in low light conditions, where there is not enough light to get the ISO down to desired value. It's of course a balance, so the snapshot doesn't get too dark, but with a little exercise, it's possible to get really good results. The torch can also be used as a flash, even if that often results in less beautiful snapshots.
John Niclasen 2013 © Copyright